We show you step by step how to create trendy festival nails.
Summer, and festivals in particular, is the perfect opportunity to embrace bolder colors, shapes, and patterns on our nails. trends this year Szálka Hajnalkathe NAILSPA Its owner will introduce you and give you tips on how to create a stunning festive manicure for yourself.
Colors and shapes
As for the colors: keep them as bright and bright as possible and feel free to wear as many of them as you can on our nails! Even if you normally wear a smoother, more restrained shade of gel polish, you can opt for a cyclamen or coral red shade for summer, but neon hues also work well with tanned skin. It is also worth enhancing the manicure with sparkles or rhinestones, either on one or several nails, as these decorations sparkle nicely in the sunlight.
In terms of shapes, the very long, pointed, tubular nail and the more slender and more elongated almond shape are fashionable. However, the expert advice is to wear the right shape and length for our lifestyle and abilities. Of course, it can be a little longer than usual, but in moderation.
NAILSPA / Szálkai Hajnalka
NAILSPA / Szálkai Hajnalka
NAILSPA / Szálkai Hajnalka
NAILSPA / Szálkai Hajnalka
NAILSPA / Szálkai Hajnalka
NAILSPA / Szálkai Hajnalka
NAILSPA / Szálkai Hajnalka
NAILSPA / Szálkai Hajnalka
NAILSPA / Szálkai Hajnalka
Do it yourself!
You can also prepare a festival manicure at home. The general basic steps are as follows:
- Remove all polish from the surface of your nails, then wash your hands! Work on a clean, lint-free nail surface!
- File your nails to the same length and shape, then gently file the surface of your nails!
- Put the varnish in a shady and cool place! (Always store the varnish in a part of the apartment protected from sunlight, so it retains its proper consistency for a long time. If it gets thicker—the drying time can be quite long in this case—it can be thinned with a few drops of varnish thinner if necessary.)
- Apply the color in two coats over the base coat, even on a smooth varnish, and finish with the top coat! These four layers ensure strong and durable nails.
Here are some trendy nail designs step by step:
1. Paint a base color, then use two other colors to make dots on the surface of the nail, then use a toothpick to swipe one color onto the other! This is how you achieve a smoky marble effect.
NAILSPA / Szálkai Hajnalka
NAILSPA / Szálkai Hajnalka
NAILSPA / Szálkai Hajnalka
NAILSPA / Szálkai Hajnalka
Another version:
NAILSPA / Szálkai Hajnalka
NAILSPA / Szálkai Hajnalka
NAILSPA / Szálkai Hajnalka
NAILSPA / Szálkai Hajnalka
NAILSPA / Szálkai Hajnalka
2. Add very colorful dots of different colors and sizes to a white or light base coat! You can use this decoration on one or two fingers only. In the latter case, you can paint the rest of your nails with the colors of the dots.
NAILSPA / Szálkai Hajnalka
NAILSPA / Szálkai Hajnalka
NAILSPA / Szálkai Hajnalka
NAILSPA / Szálkai Hajnalka
NAILSPA / Szálkai Hajnalka
NAILSPA / Szálkai Hajnalka
NAILSPA / Szálkai Hajnalka
3. You can even create flower shapes from colored dots.
NAILSPA / Szálkai Hajnalka
NAILSPA / Szálkai Hajnalka
NAILSPA / Szálkai Hajnalka
NAILSPA / Szálkai Hajnalka
NAILSPA / Szálkai Hajnalka
4. With the help of a thin brush, you can draw a rainbow of selected bright colors on your nails. The starting point here is also a light base layer.
NAILSPA / Szálkai Hajnalka
NAILSPA / Szálkai Hajnalka
NAILSPA / Szálkai Hajnalka
NAILSPA / Szálkai Hajnalka
NAILSPA / Szálkai Hajnalka
NAILSPA / Szálkai Hajnalka
NAILSPA / Szálkai Hajnalka
5. Very summery watermelon design, you can also paint it with a thin brush.
NAILSPA / Szálkai Hajnalka
NAILSPA / Szálkai Hajnalka
NAILSPA / Szálkai Hajnalka
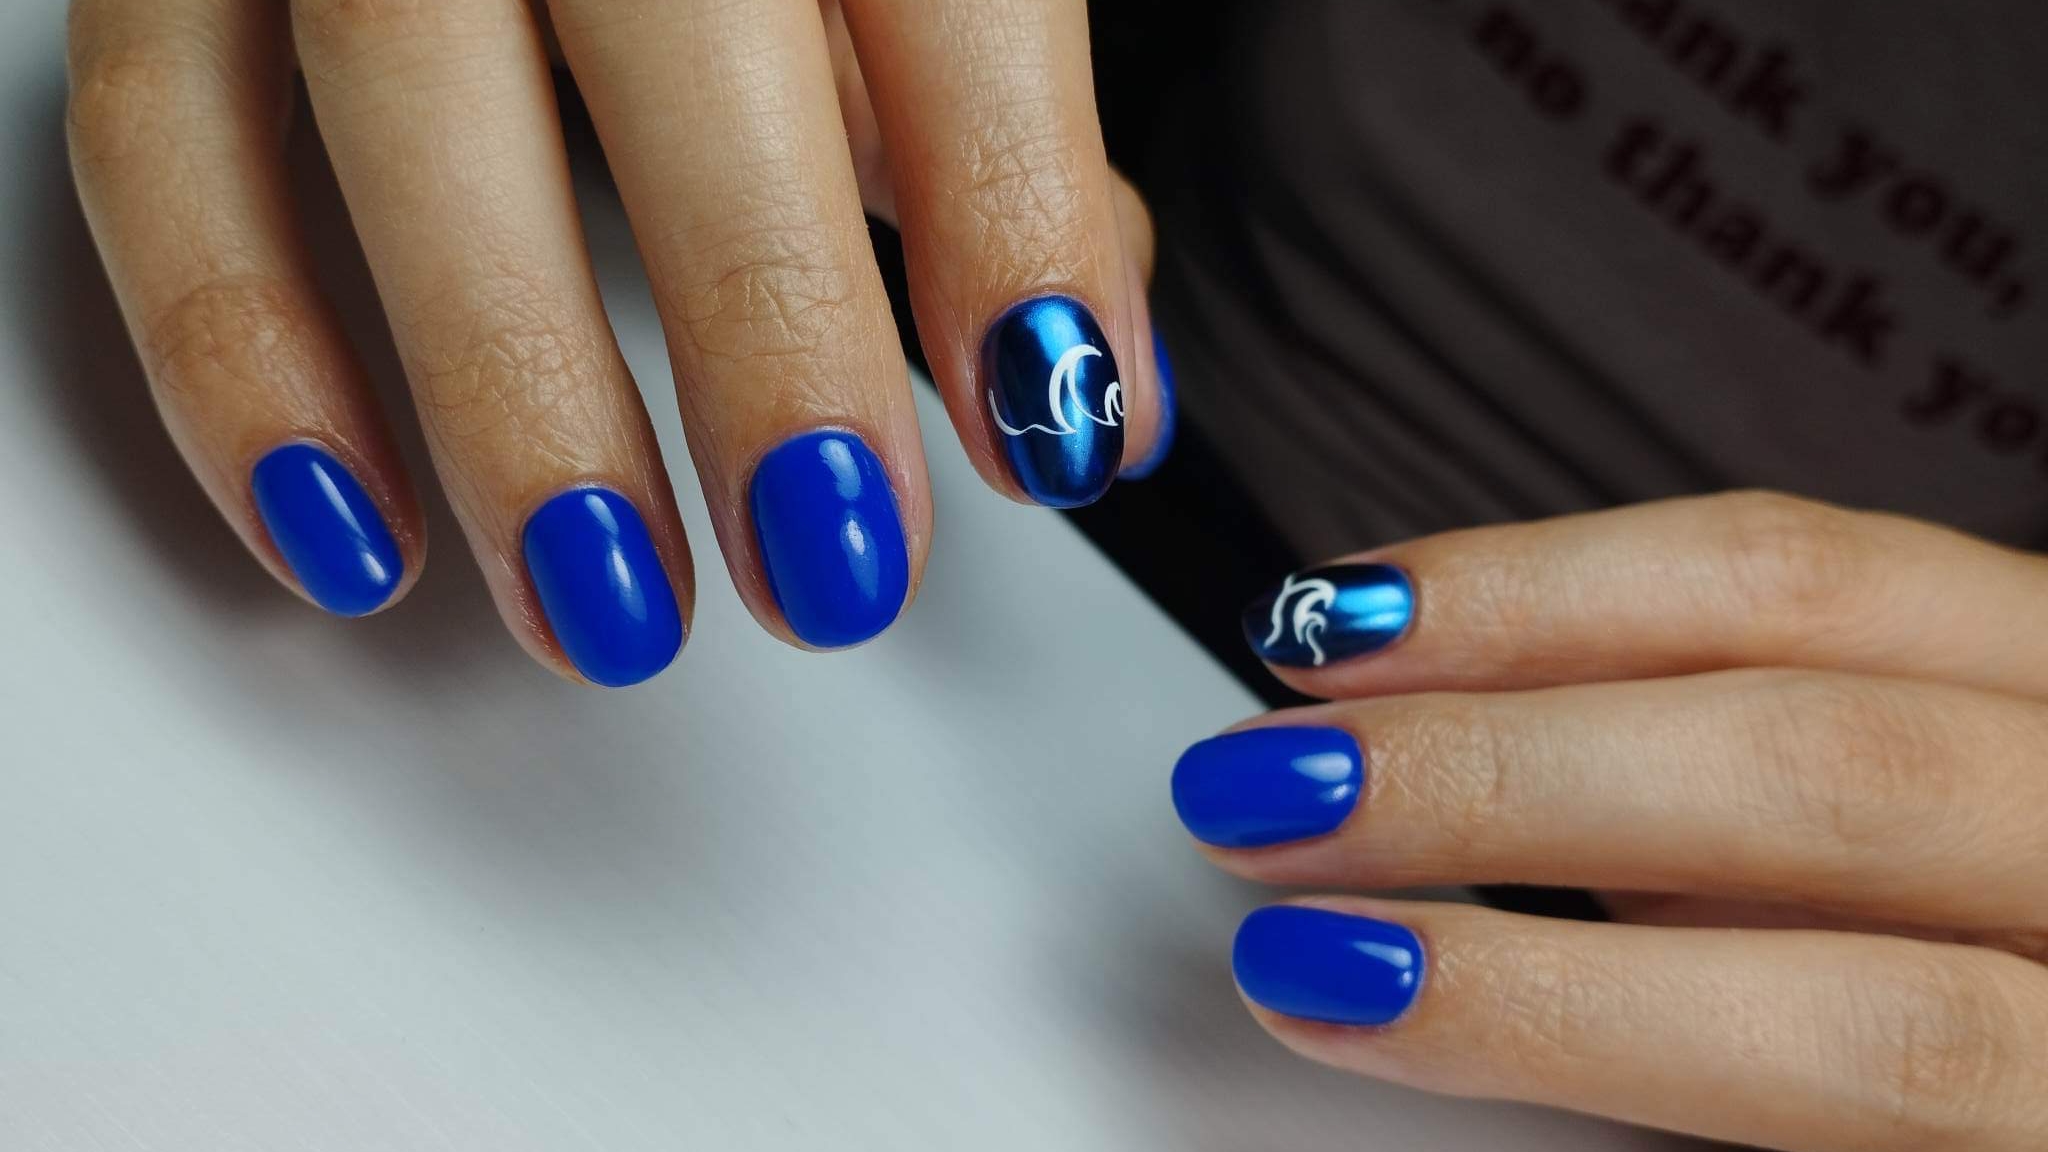
6. With a thin brush, you can also draw sea-like waves on your nails. The end result is a blue French lacquer with some wavy and irregular lines.
NAILSPA / Szálkai Hajnalka
NAILSPA / Szálkai Hajnalka
NAILSPA / Szálkai Hajnalka
NAILSPA / Szálkai Hajnalka


